
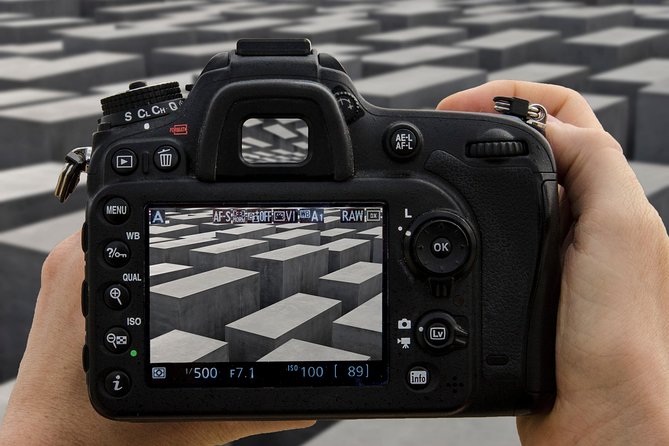
Reviewed · PHOTOGRAPHY SESSIONS
Berlin Photography Masterclass – Private Photography Lesson
Berlin turns into a camera playground. This 3-hour private photography walking lesson in central Berlin strings together the big hitters, like the Reichstag and the Berlin Wall, and then pushes you into night photography skills you can actually use. It is designed for a small group, with a route you can tailor to what you want most, including classic landmarks and city views.
I especially like that you get hands-on instruction as you walk, not just a sightseeing lecture. The coaching style can be very patient and practical, including real camera help and feedback on what you just shot, the kind of guidance associated with instructors like Gareth, Marzena Skubatz, Alexia, and Hannah. You also like having a built-in plan for where to stand and what to photograph next, which keeps you moving with purpose instead of wandering around guessing.
One thing to consider: the time is tight for 10 major photo stops. If you want long, slow sessions at one location, you may feel a little rushed because the whole point is learning and shooting while the light and the light sources change around you.
In This Review
- Key takeaways before you go
- Why this Berlin photo lesson feels different than a normal tour
- Price and value: what $180.04 buys you in 3 hours
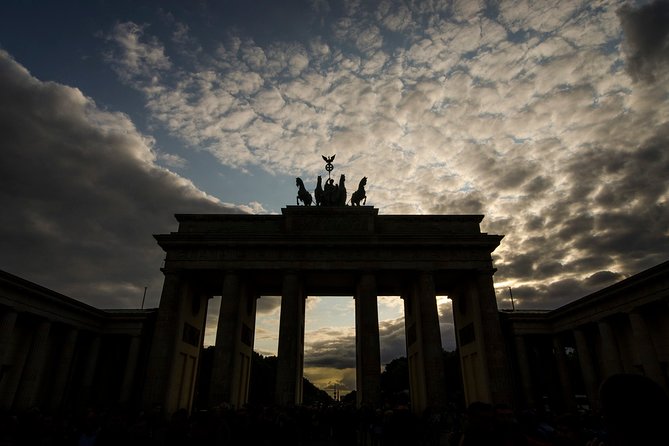
- The walk starts at Pariser Platz, then you tackle the Reichstag and Brandenburg Gate
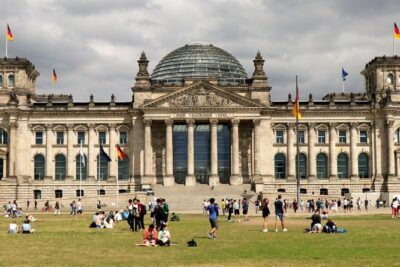
- Photographing the Reichstag building
- Shooting the Brandenburg Gate
- Potsdamer Platz, the Berlin Wall, and Alexanderplatz: learning how to handle light and motion
- Potsdamer Platz: busy by design
- The historic Berlin Wall: turning a monument into a photo
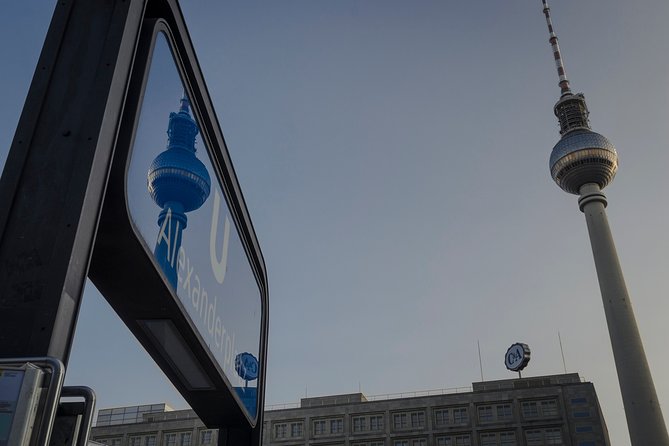
- Alexanderplatz: a lesson in bright lights
- Oberbaum Bridge and Modersohntraßer viewpoint: practicing reflections and city depth
- Oberbaum Bridge: angles, structure, and reflections
- The Modersohntraßer city view
- East Side Gallery and Nikolaikirche: historic scenes that reward careful focus
- East Side Gallery: murals in low light
- Nikolaikirche: a classic focal point
- Berliner Dom and Gendarmenmarkt: finishing with grand scale and controlled drama
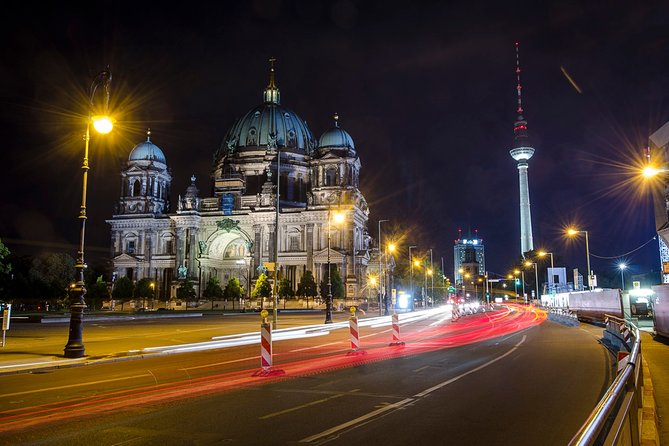
- Berliner Dom: large subject, tricky contrast
- Gendarmenmarkt: a calmer scene for your final frames
- Night photography coaching you can apply right away
- What to bring so you get the most out of the 3 hours
- Should you book the Berlin Photography Masterclass?
- Quick FAQ
- FAQ
- How long is the Berlin Photography Masterclass?
- How much does the private photography lesson cost?
- Where does the tour start, and where does it end?
- Is this tour private?
- What is the maximum group size?
- What language is the tour offered in?
- Will you visit all weather conditions?
- What landmarks are included during the photo stops?
- Are drinks included?
- Are service animals allowed?
Key takeaways before you go
- Small group, maximum 4 travelers, so you can get real feedback instead of generic tips
- Landmark-to-landmark route that includes the Reichstag, Brandenburg Gate, Berlin Wall, and Berliner Dom
- Night photography focus, with guidance on using your camera after dark
- Instructor-led photo coaching, including picture review and camera setting advice
- Private tour flexibility, so you can adjust the itinerary to your preferences
- All-weather schedule, dress for walking in Berlin conditions
Why this Berlin photo lesson feels different than a normal tour
This is not a museum tour with a camera stuck in your hand. It is a photography walk built around one goal: help you leave with better photos and a better way to see the city. You are not just looking at famous buildings, you are learning how to frame them, how to handle nighttime lighting, and how to translate what you want into camera settings.
The format matters. With a maximum of 4 travelers, the guide can actually respond to what you are shooting. If one person is fighting focus, they can slow down for that. If another person is getting blown highlights near bright lights, they can suggest a different approach. In small groups, you get faster course correction.
It is also a real “walk with a purpose” experience. The stops are spaced so you can practice different styles: big architectural symmetry at formal sites, motion and crowd energy at squares, and low-light, high-contrast scenes near historic walls and domes. That variety is great for night photography because it forces you to adapt, not just copy one trick.
More Photo Tours in Berlin
- Berlin: Fotografiska Photography Exhibition Ticket
★ 4.6 · 168 reviews - Berlin Essentials: Private Photoshoot at Berlin’s top sites
★ 4.8 · 75 reviews - 5hours: Guide, Chauffeur & Photographer in Berlin private Tour
★ 5.0 · 66 reviews
Price and value: what $180.04 buys you in 3 hours
At about $180.04 per person for roughly 3 hours, the value depends on what you want. If you already know your camera well and you mainly want photos as souvenirs, you might prefer a standard guided walk. But if you want structured teaching from a local guide plus a professional photographer guide, the price starts to make sense quickly.
You are paying for three things:
1) A short, efficient route through major photo subjects
2) Personalized guidance while you shoot
3) A night photography training focus, so the darkness becomes part of the lesson instead of a problem
Also, this is offered in English, and it can be operated by a multi-lingual guide, which helps if your group is mixed. You get a mobile ticket, and the session runs in all weather conditions, so you are not likely to get canceled just because the sky is doing Berlin things.
One small cost detail to plan around: drinks are not included. Bring water or plan to grab something before or after.
The walk starts at Pariser Platz, then you tackle the Reichstag and Brandenburg Gate
The session begins at Brandenburg Gate, Pariser Platz 10117 Berlin, and ends back at the meeting point. Starting at this spot is smart for photography because it is an anchor point for the city’s most iconic views. It is easy to orient yourself, and it sets the tone: you are going to be shooting big, bold subjects.
Photographing the Reichstag building
The Reichstag stop is a great place to practice how to frame a monumental building without turning it into a distorted mess. At night, you also get dramatic lighting that can make the textures of stone and metal pop, but it also increases contrast. The coaching here is likely to focus on composition and camera control, including what to do when bright elements steal attention from the details you want.
A practical tip for you: when you are standing far enough back to get the full facade, try shooting at least one angle that includes foreground elements. Even one hint of pavement or a nearby line can give your photo depth.
A few more Berlin walks and trips to compare
- BERLIN PHOTO TOUR with a professional Photographer from Berlin
★ 5.0 · 44 reviews - Berlin: Ticket for Photography Exhibitions at C/O Berlin
★ 4.5 · 39 reviews - Berlin: Private Photo Session with Professional Photographer
★ 4.9 · 34 reviews - Berlin: Early Morning Private Photoshoot to avoid the Crowd
★ 4.8 · 20 reviews
Shooting the Brandenburg Gate
Next up is the Brandenburg Gate itself. This is where you can practice symmetry, leading lines, and balancing the gate with its surroundings. At night, the trick is usually managing strong light sources so they do not overpower the rest of your image.
I like this pairing because it teaches you to switch modes fast. Reichstag often rewards careful framing. Brandenburg Gate rewards either bold centered composition or a slightly off-center approach that gives the scene energy.
Potsdamer Platz, the Berlin Wall, and Alexanderplatz: learning how to handle light and motion
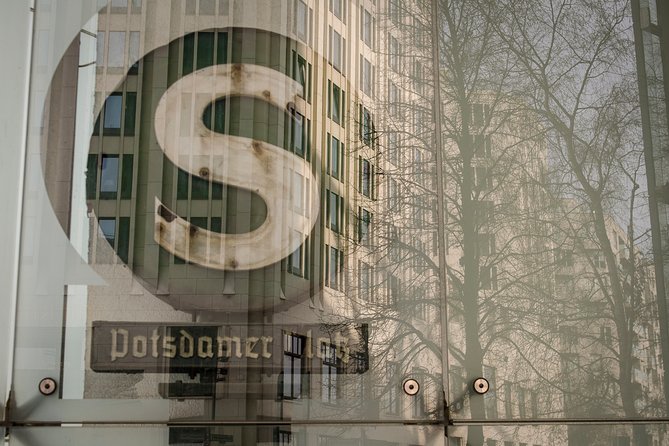
After the grand gates, the route shifts into places where Berlin looks busy and alive. That matters for night photography because city scenes often include moving people, lights, and occasional vehicles, all competing for your camera’s attention.
Potsdamer Platz: busy by design
At Potsdamer Platz, you get a mix of modern structures and public space. This stop is useful because it pushes you to think about how to capture motion. Do you want sharp people against light? Do you want blur to show energy? With a guide, you can test approaches in a controlled setting instead of experimenting blindly for an hour.
You also get a chance to practice “what to ignore.” With so many light sources around, you learn to frame tighter and let the camera do less work.
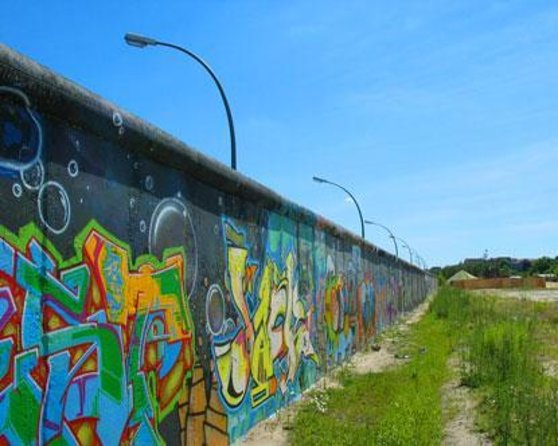
The historic Berlin Wall: turning a monument into a photo
Then comes the Berlin Wall stop. This is not just a landmark, it is a place where your photo choice has meaning. Night lighting can make the wall feel even more dramatic, but it can also reduce clarity if you shoot in a way that loses texture.
The best way to handle it is to shoot for storytelling. Include a human scale element if possible, or frame to show the wall’s length or the surrounding street geometry. The guide’s feedback can help you decide whether your strongest image is about faces, textures, or lines.
Alexanderplatz: a lesson in bright lights
At Alexanderplatz, the city’s lights tend to do what they do best, they get bright and they get everywhere. This stop is a test of exposure choices. You might be tempted to make everything bright, but that can wash out details.
A smart goal for you here: capture at least one image where the subject is crisp and the background is controlled, even if the background is slightly darker. That contrast often looks more “photographic” than perfectly even brightness.
Oberbaum Bridge and Modersohntraßer viewpoint: practicing reflections and city depth
Berlin has a way of making reflections look like they were designed for cameras. Two stops on this route encourage that effect: Oberbaum Bridge and the view from Modersohntraßer.
Oberbaum Bridge: angles, structure, and reflections
At Oberbaum Bridge, you can work on the balance between structure and atmosphere. Bridges give you leading lines, and night lighting often creates reflection opportunities on nearby surfaces. If you have experience with low-light, this is a good place to apply it. If you are new to it, it is still forgiving because the subject is strong even when the background is busy.
Try composing one photo where the bridge dominates, then another where the lights reflect to create a second visual layer. That switch helps you learn quickly.
The Modersohntraßer city view
The stop at the view of the city from the Modersohntraßer area is where you can practice the “bigger picture.” This is useful if you want to understand Berlin’s layout, because wide views help you see how neighborhoods and major lines connect.
For your camera settings, this kind of view often pushes you to think about stabilization and exposure time. You do not need to guess. A guide can help you translate what you are seeing into settings that match your goal.
East Side Gallery and Nikolaikirche: historic scenes that reward careful focus
Next the route moves into emotionally loaded and visually textured places: the East Side Gallery and Nikolaikirche. These stops are ideal for learning how to focus in darker settings and how to avoid flattening detail.
East Side Gallery: murals in low light
The East Side Gallery stop puts you among historic murals. At night, the colors can look incredible, but only if your exposure and focus are under control. A common problem is turning a photo into a dim silhouette of shapes. With coaching, you can learn how to keep the mural readable while still letting the surroundings feel atmospheric.
For you, a good strategy is to shoot your own “story sequence.” One shot wide to capture context, one shot tight to capture paint texture or a specific figure. That way, even if one frame is compromised by motion or lighting, you still get options.
Nikolaikirche: a classic focal point
At Nikolaikirche, you are working with a recognizable historic church form. Churches tend to reward careful alignment, especially at night when the sky is darker and the structure becomes the clear subject. The lighting around a church can create halos or highlight edges, so you will likely want to watch for blown highlights near bright areas.
If your guide reviews your images on the spot, this is a place where that feedback can be very useful because you can immediately adjust for the next frame.
Berliner Dom and Gendarmenmarkt: finishing with grand scale and controlled drama
The last stretch of the walk is a strong one-two: the Berliner Dom and Gendarmenmarkt. These are different styles of “grand,” and shooting them back-to-back helps you learn to adapt.
Berliner Dom: large subject, tricky contrast
The Berliner Dom is big, and at night it often looks even bigger because of lighting. That is great for drama, but it also creates high contrast between bright architectural highlights and darker shadow areas.
This is where camera technique matters. If you have ever tried to photograph a cathedral at night and ended up with an image that is either too dark or too washed out, you know the problem. A photo guide can help you find a workable balance so the structure reads well.
Gendarmenmarkt: a calmer scene for your final frames
Finally, you reach Gendarmenmarkt. The feel here is more open and symmetrical, which is perfect for making clean compositions after the intensity of domes and historic walls. Night photos at squares can look amazing when you get the spacing right between buildings and the lighting sources in the area.
For your last shots, focus on simplicity. One strong composition is often better than trying to capture everything at once.
Night photography coaching you can apply right away
A big theme in the feedback about this experience is the teaching. People praised patient instruction and practical camera help, including learning not just about night photography techniques, but also about how to use their cameras with confidence. That includes guidance on camera features and relationships like aperture and shutter speed, plus feedback that can be critical in a useful way.
Here is what that usually means for you on the street:
- You get help translating a scene into a camera plan, instead of random experimenting
- You practice the “why” behind settings, especially as lighting changes from stop to stop
- You can get your pictures reviewed and learn alternative approaches, so you do not repeat the same mistake twice
Night photography is a skill, not a luck trick. You are working with darker conditions, and that means your camera decisions affect everything: focus reliability, brightness, noise, and motion blur. The route in this tour forces you to practice under real conditions, not just in one static viewpoint.
One more practical note: the tour operates in all weather conditions. That is good because it makes you responsible for your own comfort. It also means you will want to dress for walking, protect your gear if rain starts, and keep your hands warm enough to operate confidently.
What to bring so you get the most out of the 3 hours
The tour gives you the subjects and the plan. You still control your results with what you bring and how you handle it.
Bring what you need for low-light shooting:
- Your camera and charger, plus extra battery if you have one
- Something to keep you comfortable in the cold and steady while you stand still
- A way to keep your hands steady if you use it, like a compact support, if that is part of your routine
Also, since drinks are not included, plan a quick stop before or after if you want one. It helps your focus stay on the lesson instead of your stomach.
Because the route includes a lot of walking and multiple photo stops, it helps to wear shoes you trust. Berlin nights are great for photos, but sore feet ruin the fun fast.
Should you book the Berlin Photography Masterclass?
If you want a short, high-impact way to learn night photography while seeing major Berlin icons, this is a strong pick. The rating of 4.7 from 23 reviews and the 96% recommendation rate point to consistent satisfaction, especially around teaching quality. I think it is a particularly good fit if you are comfortable with walking and you want your camera skills to improve quickly.
You might skip it if you want long stays at fewer locations, or if you prefer a purely scenic photo walk with no focused coaching. This is designed for learning and execution, not for wandering at your own tempo.
If you do book it, go in with one simple goal: pick one setting or technique you want to master during the walk, then ask your guide for help applying it at the next stop. That way, the route becomes more than a checklist, it becomes a skill-building path through Berlin.
Quick FAQ
FAQ
How long is the Berlin Photography Masterclass?
It lasts about 3 hours.
How much does the private photography lesson cost?
The price is $180.04 per person.
Where does the tour start, and where does it end?
It starts at Brandenburg Gate, Pariser Platz 10117 Berlin, Germany. The activity ends back at the meeting point.
Is this tour private?
Yes, it is listed as a private tour.
What is the maximum group size?
The maximum is 4 travelers.
What language is the tour offered in?
It is offered in English, and it may be operated by a multi-lingual guide.
Will you visit all weather conditions?
It operates in all weather conditions, so you should dress appropriately.
What landmarks are included during the photo stops?
The route includes the Reichstag, Brandenburg Gate, Potsdamer Platz, the Berlin Wall, Alexanderplatz, Oberbaum Bridge, the view from Modersohntraßer, East Side Gallery, Nikolaikirche, Berliner Dom, and Gendarmenmarkt.
Are drinks included?
No, drinks are not included.
Are service animals allowed?
Yes, service animals are allowed.
More Workshops in Berlin
- Berlin: Self-Guided Family and School Class Scavenger Hunt
★ 4.6 · 128 reviews - Berlin: Wine on Canvas – Paint Workshop and Wine Tasting
★ 4.7 · 59 reviews - Berlin: Casting Workshop with Natural Materials
★ 5.0 · 23 reviews - Eat Like a Berliner: Market Tour, Cooking Class and Lunch
★ 5.0 · 15 reviews
Newest Berlin reviews on the site
- Your ticket to The Wall Museum Berlin★ 3.0 · 60 reviews
- Rickshaw Tours Berlin – Groups of up to 16 people with several rickshaws★ 4.0 · 97 reviews
- Love and War in Berlin: Self-Guided Story Puzzle Walk★ 5.0 · 7 reviews
- Warnemuende Shore Excursion: Berlin Private Sightseeing Tour from Rostock★ 5.0 · 4 reviews
- eSIM for Germany and 34 European Countries★ 4.5 · 16 reviews
- Warnemuende Shore Excursion: Private Berlin Tour★ 4.5 · 27 reviews
- Walking on the Wall: 3-Hour Tour in Berlin★ 4.5 · 34 reviews
- Karl-Marx-Allee Tour: Life and Architecture in East Berlin★ 5.0 · 19 reviews
Photography Sessions, compared.
Berlin Essentials: Private Photoshoot at Berlin’s top sites
Read our review →
5hours: Guide, Chauffeur & Photographer in Berlin private Tour
Read our review →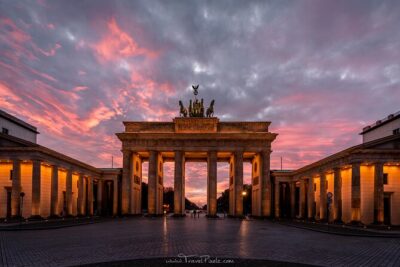
BERLIN PHOTO TOUR with a professional Photographer from Berlin
Read our review →
Ticket for Photography Exhibitions at C/O Berlin
Read our review →Browse the lists this tour appears in